Authentication
At the end of the previous chapter, the app had a real shell, but it still did not know how to sign users in. In this chapter, we add JSKIT's local auth provider, the stock login and sign-out routes, and the files that make authentication visible in the shell.
This chapter still does not add Supabase or the database-backed users layer. That is intentional. Keep authentication basic until the app's main product workflows exist, then add Supabase, OAuth, OTP, provider linking, profile projection, or workspace/account complexity only when those features are actually needed.
To get back to the same starting point as the end of the previous chapter, run:
npx @jskit-ai/create-app exampleapp --tenancy-mode none
cd exampleapp
npm install
If you are already continuing from the previous chapter, you are already in the right place and can skip that setup.
Installing the auth layer
From inside exampleapp, run:
npx jskit add package auth-provider-local-core
npx jskit add package auth-web
npm install
These package installs add the provider-neutral auth core, the auth web layer, and the local provider. They give the app working register, login, logout, session, and password recovery flows without requiring an external auth service.
The final npm install matters for the same reason it did in the shell chapter: jskit add rewrites the scaffold and updates package.json, but npm install is what actually downloads the newly referenced runtime packages.
Running it
Authentication needs both the browser-facing dev server and the backend runtime, so start both:
npm run dev
npm run server
Then open http://localhost:5173/auth/login in the browser.
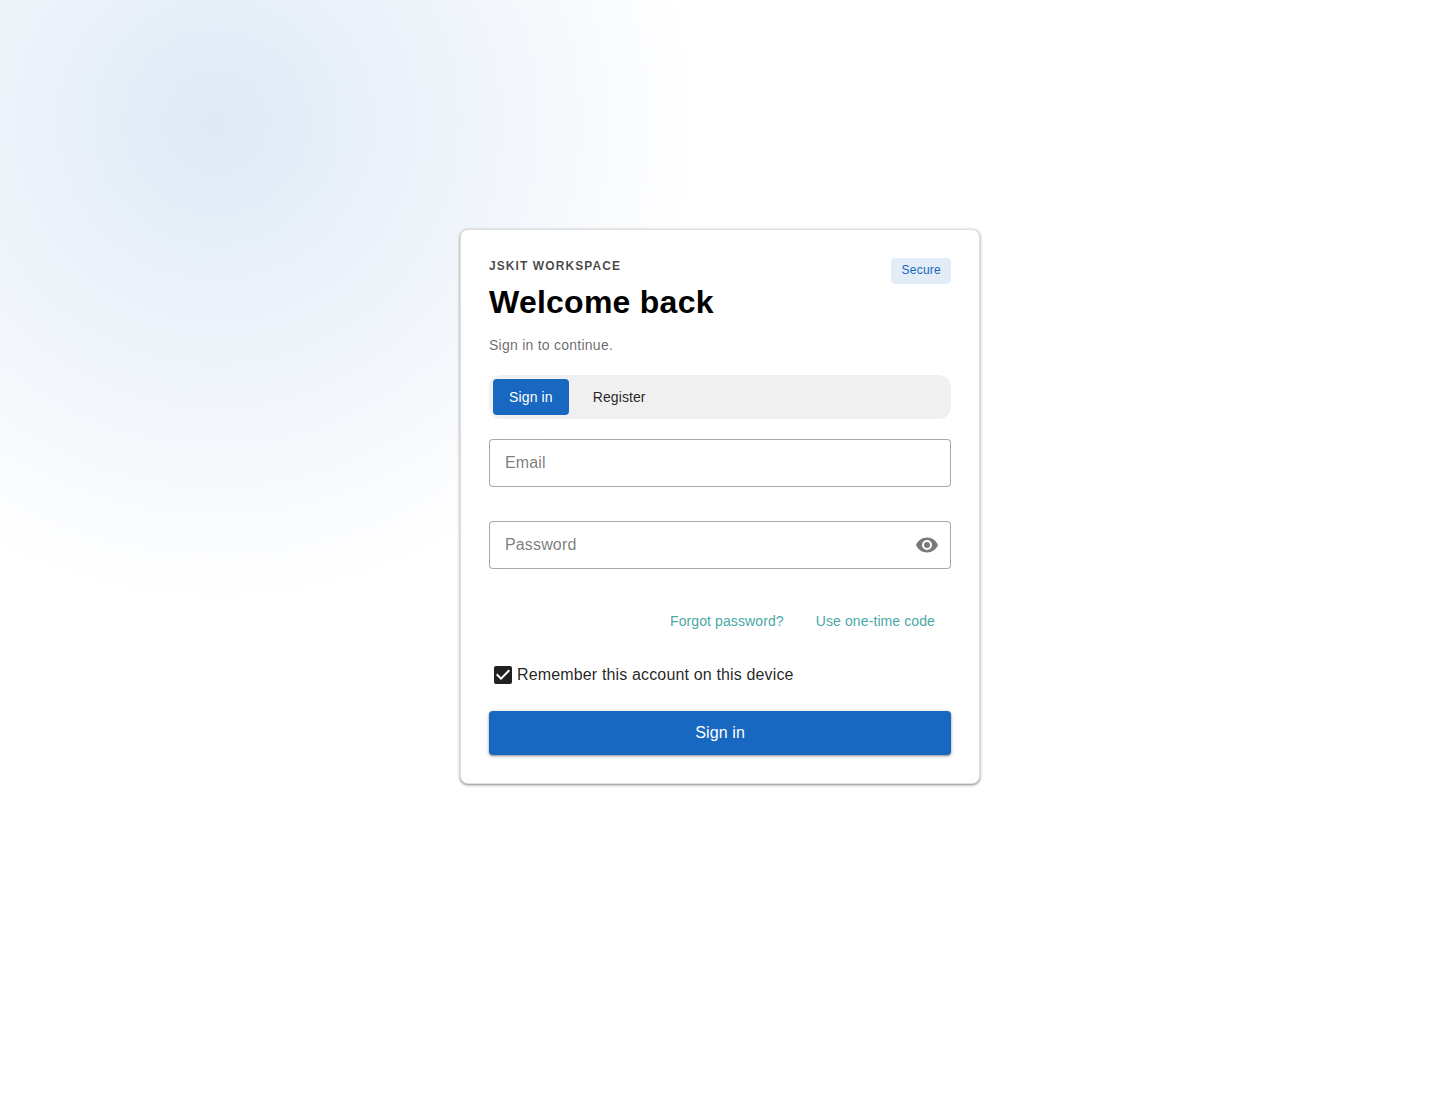
The login page is real and renders only the modes supported by the active provider.
- Sign in is the normal email-and-password flow.
- Register creates a local auth user.
- Forgot password? requests a password reset link when recovery is configured.
- Remember this account on this device stores a small local hint in browser storage so the next visit can greet the last-used account and let the user keep that email preselected.
If you go back to http://localhost:5173/home, the shell also has a small auth widget in the status area. When you are signed out it shows a guest state and a menu entry that leads to /auth/login. After you sign in, the same placement changes to a sign-out menu.
Reading the screen carefully
The login card is not a single form. It is a small state machine that switches between several modes.
Normal sign-in mode
This is the first screen you see.
- The
Emailfield is validated as an email address. - The
Passwordfield is validated with the password rules from the shared auth command schema. - The eye icon only changes whether the password is visible in the browser.
- The main
Sign inbutton posts toPOST /api/login. - If sign-in succeeds, JSKIT refreshes the current session and redirects back to the requested return path.
The small links under the password field are not decoration.
Forgot password?switches the card into password-reset-request mode.Use one-time codeswitches the card into OTP mode when the active provider supports OTP. The local provider does not show this link.
Register mode
When the user presses Register, the form changes in three important ways.
- The screen shows the
Create your accounttitle. - A
Confirm passwordfield appears. - The main submit button changes from
Sign intoRegister.
Pressing Register sends a sign-up request through POST /api/register. With the local provider, JSKIT writes the local auth record and creates a session immediately.
What happens next depends on the active provider's capabilities.
- If email confirmation is required, the provider creates the user but does not return a live session. The card then switches to a dedicated confirmation state.
- If email confirmation is not required, the user is registered and signed in immediately.
Email-confirmation state
If the active provider requires confirmation, the screen changes again. The local provider does not require email confirmation, so most first apps will not see this mode.
- The mode-switch buttons disappear.
- The card shows a confirmation message instead of the email/password fields.
Go to main screenreturns to the app.Resend confirmation emailcallsPOST /api/register/confirmation/resend.Back to sign inreturns to the normal login mode.
This matters because a junior developer might otherwise assume registration failed. In reality, the provider may already have created the auth identity; the browser just does not have an active session yet.
One-time-code mode
When a provider supports OTP, Use one-time code changes the form again.
- The password field disappears.
- A
One-time codefield appears. - A secondary button called
Send one-time codeappears. - The main button changes to
Verify code.
Those two buttons do different jobs.
Send one-time coderequests the email throughPOST /api/login/otp/request.Verify codesubmits the code throughPOST /api/login/otp/verify.
The local provider does not implement OTP. Supabase and future providers can expose this mode through the same capability contract. In other words, OTP is an opt-in sign-in method, not something the first app needs up front.
Password-reset-request mode
Forgot password? does not immediately let the user type a new password. It switches to a reset-request mode.
- The password field disappears.
- The main button changes to
Send reset instructions. - Submitting this screen calls
POST /api/password/forgot.
That endpoint asks the active provider to start password recovery. With the local provider, SMTP is used when configured; otherwise local development can log or return the recovery URL depending on environment settings.
The recovery link opens /auth/reset-password. That page exchanges the recovery token for a short-lived recovery-scoped session, lets the user choose a new password, and then clears the recovery session.
Remembered account behavior
The checkbox Remember this account on this device is also worth understanding.
If it stays checked and the user successfully signs in, registers, or verifies an OTP code, JSKIT stores a small browser-local hint with:
- the normalized email address
- a masked version of the email
- a display name
- a
lastUsedAttimestamp
On the next visit, the card can show a Welcome back, ... panel and a Use another account button. This is only a browser convenience feature. It is not a second authentication factor, and it is not a server-side session store.
OAuth buttons
The screen is also ready to show OAuth provider buttons, but only if the active provider supports OAuth and providers are configured. Local auth intentionally keeps this off.
For a later Supabase setup, config.server.js can keep this empty at first:
config.auth ||= {};
config.auth.profileMode = "provider";
config.auth.oauth = {
  providers: [],
  defaultProvider: ""
};
That is why the login card does not show buttons like Continue with Google.
After switching to a provider that supports OAuth, turning on Google has two separate setup steps.
First, configure Google and Supabase:
- In Google Auth Platform, create a Web application OAuth client.
- Add your browser URLs as Authorized JavaScript origins.
- In Supabase, open the Google provider settings and copy the provider callback URL shown there.
- Add that Supabase callback URL as an Authorized redirect URI on the Google OAuth client.
- Back in Supabase, paste the Google Client ID and Client Secret into the Google provider settings and enable the provider.
- Make sure Supabase's Site URL and Redirect URLs still match the real browser URL your app uses.
Then tell JSKIT to expose the provider in the login UI:
config.auth ||= {};
config.auth.oauth = {
  providers: ["google"],
  defaultProvider: "google"
};
providers controls which OAuth buttons the stock login screen is allowed to render. defaultProvider tells JSKIT which provider to prefer when it needs a default choice. If the provider is configured in Supabase but missing from this list, the button still does not appear in the JSKIT login screen.
Using auth in your own app
The most important thing this chapter gives you is not just a login page. It gives you three real app-building tools:
- a route-level auth guard
- auth-aware placement predicates
- a client-side auth composable you can read in your own components
Those are different tools, and they do different jobs.
- A route guard protects a URL.
- A placement predicate controls whether a menu entry or widget is visible.
- The auth composable lets your component react to the current session state.
That separation matters. Protecting a route does not automatically hide a menu entry, and hiding a menu entry does not protect a route.
Start with a normal public page
Generate a simple page under the public home surface:
npx jskit generate ui-generator page home/reports/index.vue --name "Reports"At this point the page is still public, because home is a public surface. JSKIT creates:
src/pages/home/reports/index.vue- a new menu placement in
src/placement.js
The placement entry is just a normal shell link:
addPlacement({
  id: "ui-generator.page.home.reports.link",
  target: "shell.primary-nav",
  kind: "link",
  surfaces: ["home"],
  order: 155,
  props: {
    label: "Reports",
    surface: "home",
    scopedSuffix: "/reports",
    unscopedSuffix: "/reports"
  }
});
And the page file itself is a normal generated empty-state screen:
<template>
  <section class="generated-page-screen d-flex flex-column ga-4">
    <header>
      <p class="text-overline text-medium-emphasis mb-1">Screen</p>
      <h1 class="generated-page-screen__title">Reports</h1>
    </header>

    <v-sheet rounded="lg" border class="generated-page-screen__empty-state">
      <h2 class="text-h6 mb-2">No Reports activity yet</h2>
      <p class="text-body-2 text-medium-emphasis mb-0">
        Activity and actions for this screen will appear here.
      </p>
    </v-sheet>
  </section>
</template>
So immediately after generation:
- the
Reportsmenu entry is visible to everyone /home/reportsis reachable by everyone
Gate the page behind login
To make the route require login, add a route guard block to src/pages/home/reports/index.vue:
<route lang="json">
{
  "meta": {
    "guard": {
      "policy": "authenticated"
    }
  }
}
</route>

<template>
  <section class="generated-page-screen d-flex flex-column ga-4">
    <header>
      <p class="text-overline text-medium-emphasis mb-1">Screen</p>
      <h1 class="generated-page-screen__title">Reports</h1>
    </header>

    <v-sheet rounded="lg" border class="generated-page-screen__empty-state">
      <h2 class="text-h6 mb-2">No Reports activity yet</h2>
      <p class="text-body-2 text-medium-emphasis mb-0">
        Activity and actions for this screen will appear here.
      </p>
    </v-sheet>
  </section>
</template>
That one change protects the route itself. If a signed-out user tries to visit /home/reports, the auth guard runtime redirects them to the login route instead of letting the page render.
The redirect also keeps the requested target. In practice the browser ends up on a login URL shaped like this:
/auth/login?returnTo=%2Fhome%2FreportsSo after login, JSKIT can send the user back to the page they originally asked for.
Hide the menu entry when signed out
The route is protected, but the drawer link is still visible. That is expected. Route protection and shell visibility are separate concerns.
To hide the Reports menu entry until the user is logged in, update the placement entry in src/placement.js:
addPlacement({
  id: "ui-generator.page.home.reports.link",
  target: "shell.primary-nav",
  kind: "link",
  surfaces: ["home"],
  order: 155,
  props: {
    label: "Reports",
    surface: "home",
    scopedSuffix: "/reports",
    unscopedSuffix: "/reports"
  },
  // Added: only show this menu entry when the current auth context is authenticated.
  when: ({ auth }) => Boolean(auth?.authenticated)
});
The only new part is the when(...) line. That predicate is evaluated by the shell placement runtime using the auth context that auth-web injects from /api/session.
So the behavior becomes:
- signed out:
- the
Reportsdrawer entry disappears - visiting
/home/reportsmanually still redirects to/auth/login
- the
- signed in:
- the
Reportsdrawer entry appears /home/reportsrenders normally
- the
This is the most important pattern to understand: use the guard to protect the route, and use the placement when(...) function to control whether the shell exposes a link to it.
Read auth state in your own page code
Sometimes you do not want to redirect or hide a menu entry. You just want the page to react differently when a user is logged in.
For that, use useAuthStore() from auth-web. By this point in the guide the scaffold already has Pinia installed from day 0, and shell-web has already shown the same store-facing pattern for shell UI state. auth-web adds the auth version of that pattern: a Pinia store facade over the underlying auth runtime, so normal Vue code can read the session state without manually wiring subscriptions.
Here is a small example that changes src/pages/home/index.vue so it shows a success message when the session is authenticated:
<script setup>
import { useAuthStore } from "@jskit-ai/auth-web/client";

const auth = useAuthStore();
</script>

<template>
  <section class="pa-4">
    <v-alert v-if="auth.authenticated" type="success" variant="tonal" class="mb-4">
      You are logged in!
    </v-alert>

    <h1 class="text-h5 mb-2">Home</h1>
    <p class="text-body-2 text-medium-emphasis">Your account session is active on this device.</p>
  </section>
</template>
The important thing about that snippet is how little it needs to know. auth.authenticated is already reactive through Pinia, so the banner updates automatically when the session changes.
useAuthStore() also gives you the rest of the surfaced auth state and the lower-level runtime methods when you need them:
authStateauthenticatedusernameoauthProvidersoauthDefaultProviderinitialize()refresh()getState()subscribe()runtime
If you need one of those methods, keep the whole auth object instead of only destructuring a single ref:
<script setup>
import { useAuthStore } from "@jskit-ai/auth-web/client";

const auth = useAuthStore();

async function refreshSession() {
  await auth.refresh();
  console.log(auth.getState());
}
</script>
So this is not just useful for a demo banner. It is the same mechanism you would use for:
- guest vs authenticated copy
- showing a call-to-action only for signed-out users
- enabling a tool panel only for authenticated users
- rendering a user-specific welcome message
The three auth tools, side by side
By this point the surfaced auth API should be clearer:
- route file meta:
- use
"policy": "authenticated"when the page itself must be protected
- use
- placement entry:
- use
when: ({ auth }) => Boolean(auth?.authenticated)when shell UI should only appear for signed-in users
- use
- component code:
- use
useAuthStore()when the page needs to react to auth state directly
- use
That is the real development payoff of this chapter. The login system is not just a screen. It gives the app a reusable auth state model that routing, shell placements, and component code can all use.
At this point the guide has shown three distinct layers of client state:
- the scaffold installs Pinia but does not expose any package stores yet
shell-webadds shell-facing stores such asuseShellLayoutStore()auth-webaddsuseAuthStore()for authentication state
That progression is intentional. Packages keep their operational runtimes internally, but the app-facing shared state they surface to Vue code is store-based.
What the local auth install adds to the app
The interesting part of this chapter is that authentication appears in several different layers at once: environment config, public routing config, shell placements, and app-owned view wrappers.
The first new place to inspect is package.json:
{
  "scripts": {
    "server:auth": "SERVER_SURFACE=auth node ./bin/server.js",
    "dev:auth": "VITE_SURFACE=auth vite",
    "build:auth": "VITE_SURFACE=auth vite build"
  },
  "dependencies": {
    "@jskit-ai/auth-core": "0.x",
    "@jskit-ai/auth-provider-local-core": "0.x",
    "@jskit-ai/auth-web": "0.x"
  }
}
Four things are worth noticing immediately.
auth-coreowns the provider-neutral contract, shared actions, policy hooks, and capability normalization.auth-provider-local-coreis the selected provider-specific runtime.auth-webis the part that adds the web routes and the default auth UI.- there is an
authsurface-specific dev/build script family, just ashomealready had.
The provider package also writes local auth settings into .env:
AUTH_PROVIDER=local
AUTH_LOCAL_BACKEND=file
AUTH_PROVIDER=local is the selected-provider marker. AUTH_LOCAL_BACKEND=file tells the local provider to use its built-in file backend. No database URL, Supabase URL, or provider key is needed for this chapter.
The backend selection is intentionally local-provider-specific. auth.local.backend is the public server container token for replacing the file store later; Supabase and other external providers do not use it. A custom local backend must expose a single withTransaction(callback) method. JSKIT calls that method for register, login, recovery, password reset, profile update, session revocation, and security operations, and the callback receives transactional users, sessions, and recovery repositories.
The built-in file backend is for low-friction local development, first deploys with one persistent Node instance, and simple apps that accept that storage model. It writes .jskit/auth/*.passwd files behind a store-level lock. Do not treat it as horizontally scalable or serverless-safe storage; when the app needs replicated auth storage, install the DB-backed local auth package or register a custom auth.local.backend.
That DB-backed local auth storage is not the same thing as the users-core profile tables. users-core creates app-owned users and user_settings rows later. DB-backed local auth stores the provider-owned auth state that the file backend would otherwise keep in .jskit/auth/.
The batteries-included DB package is @jskit-ai/auth-provider-local-db-core. It uses JSKIT's database runtime and owns three auth-local tables:
auth_local_usersfor provider auth identities: normalized email, display name, disabled flag, password algorithm/version/salt/hash, and timestamps.auth_local_sessionsfor refresh sessions: session id, auth-local user id, refresh-token hash, session purpose such asnormalorrecovery, expiry, revocation, and timestamps.auth_local_recoveryfor password recovery: recovery token id, auth-local user id, recovery-token hash, expiry, used-at timestamp, and timestamps.
To use it, install a JSKIT database runtime and driver, install auth-provider-local-db-core, run migrations, and use AUTH_LOCAL_BACKEND=db. The package registers auth.local.backend for DB mode. If AUTH_LOCAL_BACKEND=db is set without the DB backend package, local auth fails instead of falling back to file storage.
Apps that need audit logs, login counters, MFA records, or password history should add sidecar tables that reference auth_local_users.id; do not edit the package-owned auth-local migrations or add app-specific columns to those tables. Apps with different table names, external KMS, non-SQL storage, or unusual tenancy partitioning should replace the backend by registering their own auth.local.backend.
Local auth also applies the shared auth-service decorator registry from auth-core. Use that registry when an app or package needs to wrap provider behavior without owning the local auth tables. The local package exports a narrow helper for after-register work:
import { registerAuthServiceDecorator } from "@jskit-ai/auth-core/server/authServiceDecoratorRegistry";
import { createLocalAuthRegisterHookDecorator } from "@jskit-ai/auth-provider-local-core/server/lib/index";

registerAuthServiceDecorator(app, "app.auth.local.permissions", (scope) => {
  const permissionsService = scope.make("permissionsService");

  return createLocalAuthRegisterHookDecorator({
    decoratorId: "app.auth.local.permissions",
    order: 10,
    hook: {
      hookId: "permissions",
      blocking: true,
      async handle({ actor, profile }) {
        await permissionsService.createDefaultsForUser({
          userId: actor.id,
          email: actor.email,
          displayName: profile.displayName
        });
      }
    }
  });
});
The hook must declare blocking: true or blocking: false. A blocking hook is awaited and its failure rejects the register call, which fits permission provisioning or other work the app needs before treating registration as complete. A non-blocking hook is scheduled after registration and logs failures, which fits audit logging or metrics. This helper runs after local auth registration and profile projection have succeeded; it does not share the local auth backend transaction. If the extension must be transaction-coupled with credential storage, wrap or replace auth.local.backend instead.
The local provider also has a separate password strategy seam. Use auth.local.backend to change where local auth records are stored. Use auth.local.passwordStrategy only when the app needs to change how passwords are hashed or verified, such as during a migration from an existing user table with existing password hashes.
Register auth.local.passwordStrategy before AuthLocalServiceProvider starts:
import bcrypt from "bcryptjs";
import { verifyPassword as verifyScryptPassword } from "@jskit-ai/auth-provider-local-core/server/lib/index";

app.singleton("auth.local.passwordStrategy", () => ({
  async verifyPassword(password, record) {
    if (typeof record === "string" && /^\$2[aby]\$/.test(record)) {
      return bcrypt.compare(password, record);
    }

    return verifyScryptPassword(password, record);
  }
}));
The strategy object can provide hashPassword(password), verifyPassword(password, storedPasswordRecord), or both. Missing methods fall back to the local provider's default scrypt implementation, so a migration verifier can accept old hashes while new registrations, resets, and password changes continue to write default JSKIT password records. JSKIT validates provided methods as functions and calls them with this bound to the strategy object.
Custom service callers can pass the same object directly:
createLocalAuthService({
  backend,
  config,
  passwordStrategy
});
JSKIT core does not install bcrypt or any legacy password dependency. If an app needs a legacy verifier, the app owns that dependency and keeps the backend as storage only.
If you later configure local SMTP password recovery, also set APP_PUBLIC_URL so reset links point back to the browser URL for this app.
Public routing config changes too. config/public.js has a second surface:
config.surfaceDefinitions.auth = {
  id: "auth",
  label: "Auth",
  pagesRoot: "auth",
  enabled: true,
  requiresAuth: false,
  requiresWorkspace: false,
  origin: ""
};
That requiresAuth: false line is important. The auth surface must stay public, otherwise users would need to be logged in before they could reach the login page.
The local provider does not need an app database profile mode or OAuth config. The stock login UI asks /api/session for the active provider capabilities and renders only what the selected provider actually supports. With the local provider, that means email/password login, registration, sign-out, session refresh, and password recovery when recovery is configured.
Later, if you switch to Supabase, the Supabase provider can append the app-owned OAuth visibility config and profile mode settings it needs.
The auth routes themselves are app-owned wrappers around the module-supplied default views. src/pages/auth/login.vue looks like this:
<route lang="json">
{
  "meta": {
    "guard": {
      "policy": "public"
    }
  }
}
</route>

<script setup>
import DefaultLoginView from "@jskit-ai/auth-web/client/views/DefaultLoginView";
</script>

<template>
  <DefaultLoginView />
</template>
There are two important ideas in that small file.
- The route is explicitly public.
- The app owns the page wrapper even though the actual stock login form comes from the installed module.
The meta.guard block is ordinary route metadata, not a special auth-only API. The file-based router plugin turns <route lang="json"> into a normal Vue Router meta object first, and then JSKIT reads meta.guard.policy during navigation. That same mechanism is used elsewhere in the app too.
That pattern gives you a clean customization seam later. The module supplies a working default, but the app still owns the route file and can replace or wrap the view if needed.
Authentication also becomes visible in the shell through src/placement.js:
addPlacement({
  id: "auth.profile.widget",
  target: "shell.status",
  kind: "component",
  surfaces: ["*"],
  order: 1000,
  componentToken: "auth.web.profile.widget"
});

addPlacement({
  id: "auth.profile.menu.sign-in",
  target: "auth.profile-menu",
  kind: "link",
  surfaces: ["*"],
  order: 200,
  props: {
    label: "Sign in",
    to: "/auth/login"
  },
  when: ({ auth }) => !Boolean(auth?.authenticated)
});

addPlacement({
  id: "auth.profile.menu.sign-out",
  target: "auth.profile-menu",
  kind: "link",
  surfaces: ["*"],
  order: 1000,
  props: {
    label: "Sign out",
    to: "/auth/signout"
  },
  when: ({ auth }) => Boolean(auth?.authenticated)
});
This is the shell placement system from the previous chapter doing real work again. auth-web does not hard-code a permanent auth button into ShellLayout.vue. Instead, it contributes the profile widget into the semantic shell.status placement and contributes sign-in/sign-out links into the semantic auth.profile-menu placement. Topology maps those semantic targets to concrete outlets and renderers.
So the auth story in this chapter is spread across clear responsibilities:
.envselects the local provider and its backendconfig/public.jsdeclares anauthsurfacesrc/pages/auth/*gives the app real public auth routessrc/placement.jsmakes auth visible in the shell
That is a very JSKIT-style pattern. The installed package brings the runtime behavior, but the app still owns the important seams where routing and UI get attached.
Under the hood
The runtime behind useAuthStore()
useAuthStore() is the app-facing Pinia layer, but it is not inventing a second auth system. It is a store facade over the lower-level auth guard runtime that auth-web boots on startup.
That lower-level runtime already has a small, concrete contract:
initialize()refresh()getState()subscribe()
auth-web initializes that runtime once, binds it into the Pinia auth store, and then exposes useAuthStore() as the normal component-facing API. That is why the main example earlier could stay so small.
If you strip the composable away and write the same You are logged in! example directly against the runtime, it looks like this:
<script setup>
import { computed, onBeforeUnmount, onMounted, ref } from "vue";
import { useAuthGuardRuntime } from "@jskit-ai/auth-web/client";

const authGuardRuntime = useAuthGuardRuntime({
  required: true
});
const authState = ref(authGuardRuntime.getState());
let unsubscribe = null;

const isAuthenticated = computed(() => authState.value?.authenticated === true);

onMounted(() => {
  unsubscribe = authGuardRuntime.subscribe((nextState) => {
    authState.value = nextState;
  });
});

onBeforeUnmount(() => {
  if (typeof unsubscribe === "function") {
    unsubscribe();
  }
});
</script>

<template>
  <section class="pa-4">
    <v-alert v-if="isAuthenticated" type="success" variant="tonal" class="mb-4">
      You are logged in!
    </v-alert>

    <h1 class="text-h5 mb-2">Home</h1>
    <p class="text-body-2 text-medium-emphasis">Your account session is active on this device.</p>
  </section>
</template>
That code works, and it shows exactly what useAuthStore() is wrapping:
getState()gives the first auth snapshot immediatelysubscribe(...)keeps that snapshot updated later- the component turns that imperative runtime into normal Vue refs and computeds
For ordinary Vue component code there is usually no advantage to writing it this way. useAuthStore() already gives you the same surfaced information plus the same runtime methods when you need them. The direct runtime version is mainly worth knowing so you understand the lower-level contract that auth-web itself is building on.
Who actually talks to whom
The most important thing to understand is that the browser talks to your app, and the app talks to the selected auth provider through the provider-neutral authService contract.
With the local provider, the selected provider is in the same Node process. It verifies passwords, writes sessions, and stores local auth state through auth.local.backend. The default backend writes the .jskit/auth/*.passwd files; auth-provider-local-db-core moves that storage into package-owned database tables without changing the login UI or the shared auth routes.
If users-core or another package registers auth.profile.projector, local auth now resolves that projector lazily when it actually builds an auth payload for register, login, session refresh, or request authentication. That keeps local auth boot independent from the projector's own dependencies, such as repositories behind internal.json-rest-api.
That means there are two actors in the first-app flow:
- the browser, which renders the login screen and submits forms
- the JSKIT app server, which owns
/api/login,/api/register,/api/password/*,/api/session, the selected provider, and the cookie-writing step
So the default local mental model is:
browser -> JSKIT app -> local auth provider
browser <- JSKIT app <- local auth provider
If you later switch to Supabase, the same app routes still exist, but the selected provider implementation delegates to Supabase Auth.
Password login: the full round trip
The simplest login flow is the normal Email + Password form.
On the client side, DefaultLoginView eventually calls useLoginViewActions.submitAuth(). In sign-in mode that becomes a POST to:
/api/loginwith a body shaped roughly like this:
{
  "email": "alice@example.com",
  "password": "correct horse battery staple"
}
From there, the server-side flow is:
POST /api/loginhits the route registered byauth-web.AuthController.login()receives the request.AuthWebService.login()executes the internal actionauth.login.password.auth-coreroutes that action to the selected provider'sauthService.login(...).- The local provider checks the password hash in its backend and creates a session record.
- JSKIT writes the access and refresh tokens into HTTP-only cookies.
- The API response sent back to the browser is intentionally small.
The important detail is step 6. The browser does not receive raw session tokens as normal application state. The server writes them into HTTP-only cookies instead. With the local provider, those cookies are:
jskit_local_access_tokenjskit_local_refresh_token
Those cookies are HTTP-only and sameSite: "lax", so the browser sends them back automatically on later requests, but normal client-side code cannot read them directly.
The JSON response from /api/login stays small:
{
  "ok": true,
  "username": "alice"
}
After that, the browser still is not done. The login view immediately calls /api/session to confirm the session and fetch the current auth state. If that session check comes back with authenticated: true, the client redirects to the requested returnTo path.
So the real password-login round trip is:
1. browser -> POST /api/login -> JSKIT app
2. JSKIT app -> selected auth provider login
3. selected auth provider -> JSKIT app: profile + session
4. JSKIT app -> browser: set HTTP-only cookies + { ok, username }
5. browser -> GET /api/session
6. JSKIT app -> browser: { authenticated, username, csrfToken, authCapabilities, ... }
7. browser redirects to the requested route
OAuth login: the extra browser bounce
Local auth does not expose OAuth buttons. If you later switch to Supabase and configure OAuth providers, OAuth is the case where the browser really does leave the app briefly, but the app still owns the edges of the flow.
The first step is still browser -> app. If the login page shows a button such as Continue with Google, clicking it does not go straight to Supabase. It first goes to:
/api/oauth/google/start?returnTo=/homeThat server route does three jobs:
- normalizes the provider id
- normalizes the
returnTopath - asks Supabase for the correct provider redirect URL
JSKIT then redirects the browser to Supabase's OAuth flow. The redirect URL that JSKIT asks Supabase to use points back to your app, usually /auth/login, with some query parameters describing the provider and the intended return target.
So the browser flow becomes:
browser -> /api/oauth/google/start
app -> Supabase OAuth redirect URL
browser -> Supabase / provider login page
Supabase -> browser back to /auth/login?...callback params...
When the browser lands back on /auth/login, the login page JavaScript inspects the URL. It looks for either:
- an OAuth
code, or - an access/refresh token pair
If it finds them, it does not treat the browser as fully signed in yet. Instead, it posts a small completion payload back to the app at:
/api/oauth/completeThat payload looks roughly like one of these:
{
  "provider": "google",
  "code": "..."
}
or
{
  "provider": "google",
  "accessToken": "...",
  "refreshToken": "..."
}
Now the app server finishes the job:
AuthController.oauthComplete()receives the payload.- The Supabase auth service either:
- exchanges the code with
supabase.auth.exchangeCodeForSession(...), or - restores the session with
supabase.auth.setSession(...)
- exchanges the code with
- Supabase returns
userandsession. - JSKIT syncs the local profile mirror.
- JSKIT writes HTTP-only cookies.
- The browser strips the callback params out of the URL.
- The browser refreshes
/api/session. - The browser redirects to
returnTo.
So the full OAuth dance is:
browser -> app start route
app -> Supabase redirect
browser -> Supabase/provider
Supabase/provider -> browser back to /auth/login
browser -> app completion route
app -> Supabase session exchange
Supabase -> app: user + session
app -> browser: cookies + small success payload
browser -> /api/session -> redirect
That is why the login page needs both browser-side logic and server-side routes. The browser owns the redirect dance, but the app still owns the final session establishment step.
What /api/session is really doing
/api/session is more than a yes-or-no login check. It is the app's current auth truth endpoint.
When the browser calls it, the server:
- reads the auth cookies
- asks the selected provider to authenticate the request
- refreshes or reissues provider cookies when the provider returns a refreshed session
- clears invalid cookies if the session is no longer usable
- returns the auth state the client actually needs
The response is shaped roughly like this:
{
  "authenticated": true,
  "username": "alice",
  "csrfToken": "...",
  "authCapabilities": { "...": "..." },
  "oauthProviders": [],
  "oauthDefaultProvider": null
}
That explains why the login screen and auth guard runtime both care about /api/session. It is how the browser learns:
- whether the user is authenticated
- which username to show
- which OAuth buttons to render
- which CSRF token to use for later writes
It is also why the shell widget can react cleanly to auth state without storing raw session tokens in client state. The browser just asks the app for the current session view, and the app derives that from its cookies plus the selected provider.
Authenticated Playwright testing
JSKIT supports two intentionally separate authenticated-browser paths:
- a private localhost exchange for direct local Playwright runs
- runner-provided Playwright storage state for managed previews
Neither path drives a live external login provider. Both put the resulting HTTP-only cookies into the same Playwright browser context that runs the feature assertions.
The generated playwright.config.mjs is a thin delegate to @jskit-ai/jskit-cli/test/playwright. The published helper owns the changing setup behavior:
- without
PLAYWRIGHT_BASE_URL, it builds the app and starts the local server onhttp://127.0.0.1:4173 - with
PLAYWRIGHT_BASE_URL, it uses that managed preview and does not start another server - with
VIBE64_PLAYWRIGHT_STORAGE_STATE, it loads the Vibe64-supplied authenticated state into Playwright contexts
Tests should therefore navigate with relative paths such as page.goto("/w/acme/admin/contacts").
Direct local dev-auth login
The local dev auth bypass remains deliberately narrow:
- it is available only outside production
- the request must arrive locally
- it selects an existing user and never creates one
- it requires both CSRF protection and a private exchange secret
Enable it for the Playwright process and the local server it starts:
AUTH_DEV_BYPASS_ENABLED=true
AUTH_DEV_BYPASS_SECRET=replace-this-with-a-local-dev-secret
When enabled, the app exposes POST /api/dev-auth/login-as. The body contains exactly one existing-user identity:
{ "userId": "7" }or:
{ "email": "ada@example.com" }Do not call that route from page.evaluate(). The route requires the private x-jskit-dev-auth-secret header as well as the CSRF token. Putting the secret into browser JavaScript, client-visible environment, query parameters, or page globals would defeat the exchange boundary.
Use the published Node-side helper instead:
import { expect, test } from "@playwright/test";
import { loginAsExistingUser } from "@jskit-ai/auth-web/test/playwright";

test("authenticated contacts filters", async ({ page }) => {
  await loginAsExistingUser(page, { email: "ada@example.com" });

  await page.goto("/w/acme/admin/contacts");
  await expect(page.getByRole("heading", { name: "Contacts" })).toBeVisible();
});
loginAsExistingUser() runs from the Playwright Node process. It uses the request client attached to page.context(), reads csrfToken from GET /api/session, sends that token plus x-jskit-dev-auth-secret to the login route, and leaves the response cookies in the same browser context. It reads AUTH_DEV_BYPASS_SECRET from the Node process by default and refuses to send it to a non-local URL.
That last restriction is important. A managed preview URL is not a direct localhost app connection, even when its backend eventually runs on the same infrastructure. Project code must not receive the managed host's private exchange authority.
Managed preview authentication
A managed host authenticates outside the project browser context. It performs its trusted identity exchange, writes the resulting cookies and origins to a temporary Playwright storage-state file, and starts the project test with:
PLAYWRIGHT_BASE_URL=https://managed-preview.example.test \
VIBE64_PLAYWRIGHT_STORAGE_STATE=/secure/temp/playwright-state.json \
playwright test tests/e2e/contacts.spec.ts
JSKIT only consumes that runner-neutral contract. It does not detect a particular host, call host-specific commands, proxy private headers, or install a browser.
The storage-state file is a secret because it can contain authenticated cookies. The managed runner must create it with appropriately restricted access, must not print or commit it, and must delete it after the run.
Tests using managed state do not call loginAsExistingUser(). They begin with the runner-provided identity already present and navigate using relative paths. An ordinary browser or proxy request to /api/dev-auth/login-as without the private header must continue to fail with 403 Dev auth exchange is not authorized.
Recording the result
After the actual Playwright flow succeeds, record it through JSKIT:
npx jskit app verify-ui \
  --command "npx playwright test tests/e2e/contacts.spec.ts -g filters" \
  --feature "contacts filters" \
  --auth-mode dev-auth-login-as
Use --auth-mode session-bootstrap when a managed runner supplied authenticated storage state.
jskit app verify-ui executes the command and records the command, auth-mode label, feature, and changed UI files. The --auth-mode value describes how the Playwright command was authenticated. It does not create a session, inject a secret, or alter the browser context.
For local pre-merge review, follow the recorded run with:
npx jskit doctor --against origin/mainThis keeps feature tests focused on the changed UI while preserving the security boundary around session creation.
When you later switch to Supabase
This chapter does not create anything in Supabase. If you later switch the selected provider from local auth to Supabase, keep separating Supabase auth data from JSKIT app-owned data.
When a user registers through a Supabase-backed app, Supabase creates a real auth user. According to Supabase's user-management docs, you can see users in two places.
Authentication -> Usersin the Supabase dashboard- the
authschema in the Table Editor
In practice, after someone registers against Supabase you should expect to see at least these things on the Supabase side.
- A user row exists in
auth.users. - The email address appears there.
- Supabase tracks whether the email has been confirmed yet.
- The user has a stable auth id.
- The provider is Supabase email/password unless you later add OAuth.
On the Dashboard's Authentication -> Users page, that usually means you will see a new user entry with the email address, creation time, last sign-in information once they have signed in, and confirmation state. If you open the user details, you can inspect the auth record more closely.
JSKIT's Supabase register flow also sends a starter display_name into Supabase user metadata. That means the new user can carry an initial display-name value in provider metadata even before the later database-backed users layer is installed.
This is the key distinction for the chapter.
- Supabase owns the real auth user record.
- JSKIT app-owned profile/settings rows are separate and only exist after you install the users/database layer.
So if you restart the local JSKIT server after switching to Supabase, the actual Supabase auth user is still there because that data lives in Supabase, not in your local Node process.
One more subtle point matters here.
- If registration requires email confirmation, the user can already appear in Supabase even though the browser is not signed in yet.
- If confirmation is disabled, the user appears in Supabase and gets an active session immediately.
That is why the confirmation screen in the app should be understood as a session-state difference, not a sign that the user was never created.
Summary
After this chapter, the app can really authenticate without Supabase or a database. It has a public auth surface, a stock login page, a sign-out route, and a shell widget that reflects auth state. The selected provider value lives in .env, and the web auth layer is wired into the same placement and surface system introduced earlier in the guide.
Just as importantly, the app is still deliberately incomplete. Authentication exists, but the database-backed user model does not. That separation is useful, because the next layer of the guide can explain users and persistence without having to also explain the first auth setup at the same time.